[Guide] How to Combine Audio Files on Mac with Ease


 Are you a Mac user? Have you ever found that there are so many audio files on your Mac computer? In that case, merging audio files with the same category may be a better choice. Reading this article will save your time and energy to find audio merger software. You don’t need to search in Google and then try one by one. In this guide, I list 3 audio joiners and you will know exactly every tool’ s advantages and disadvantages. Let’s move on!


Top 1.Joyoshare Video Joiner 


Joyoshare Video Joiner is a professional media merging tool. Under the help of Joyoshare, you can merge audios or videos on Mac as well as Windows computers. Except for being a great audio merger, Joyoshare also has an inbuilt video/audio editor, cutter, converter. It supports various audio and video formats. including M4A, MP3, WMA, OGG, WAV, FLAC, MP4, MOV, M4V, AVI, and so on. Joyoshare Video Joiner can merge audio files without damaging the original quality. Before merging audios, you can trim the parts you don’t need and edit audios, like adding some audio effects. Besides, you can choose any other popular formats as the output format. In that case, Joyoshare is also an audio converter. Most importantly, you can merge audios at 60X faster speed.


Why do I highly recommend Joyoshare:

  • Be compatible with both Windows and Mac computers
  • Provide an intuitive interface
  • Offer 5 full chances to merge audios for free
  • Combine audios with zero quality loss


How to join audios on Mac via Joyoshare Video Joiner


Step 1: Import tracks to Joyoshare

Download and install Joyoshare in Mac version, and then launch it. You can add audio files by dragging and dropping a whole folder or several files simultaneously. Then you can rename and rearrange the order of the audios on the left list.


Step 2: Select one mode and the output format

Joyoshare provides two modes for you: High-Speed mode and Encoding mode. If you merge audios with the same format and don’t plan to cut and edit files, picking High-Speed is the best choice. This mode can merge audios fast and losslessly. Or you can choose the Encoding mode, in which you can customize the file format, codec, resolution, frame rate, and bit rate.


Step 3: Remove needless segments of your audios

There are two ways to cut audios. First, on the main surface, after double-clicking the audio you want to trim, move the yellow sliders. Second, you can cut tracks in an inbuilt audio editor.


Step 4: Edit audios before combining

Like what I mentioned in step 3, you can trim audios in the editor. Apart from that, you can add some sound effects to your audios.


Step 5: Begin to merge audio files on Mac

In this step, what you should do is just one-click on the Convert button. Then wait a second. Your audio files will merge at 60X faster speed. When it finishes the process, the destination folder will pop up, where your merge audio locates on.  


Joyoshare Video Joiner is an offline merging tool. I want to search for some offline audio joiners because my network at home is unstable. I am scared that the uploading will disrupt or stuck at a sudden if I use online joiners. If I refresh the browser or close it, then I must upload the audios again. But if your network is strong, you can try some web-based audio mergers. Here I list 2 online merging tools. Keep reading and choose the one you need.


Top 2.Audio Joiner


Audio Joiner is an online app to join multiple audios into one, with which you can add a crossfade effect. But it only supports 4 output formats, including MP3, M4A, WAV, and FLAC. Audio Joiner also has an inbuilt cutter. You can directly move the slider with the Mouse. Besides, it supports you to rearrange the order of the tracks (support unlimited audios). This tool won’t bring data security problems because all the flies you upload will be automatically deleted several hours later. 


How to merge audios files on Mac by Audio Joiner:


Step 1: Add tracks from your computer. You can select a few audios at the same time and then rearrange their order. Or you can select the audios one by one according to the order you need.


Step 2: Choose the output format from MP3, M4A, WAV, and FLAC.


Step 3: Cut the unwanted sections. You can cut it accurately by setting the Start Time and then End time.


Step 4: Click the Join button and then download the merged audio or save it to Dropbox and Google Drive.


Top 3. Clideo


Clideo is another free online audio joiner. Clideo has an easy-to-use interface. It supports 15+ output formats, so you can convert your audios to other popular formats, like MP3, WMA, WAV, and others. Before combing tracks, you are allowed to add a crossfade effect like Audio Joiner. You can merge audio free via Clideo. But if you want to edit result after merging, you need to spend money.


How to join audios on Mac with Clideo:


Step 1: Choose audio files from the PC, Dropbox, Google Drive or URL.


Step 2: Select the output format.


Step 3: Add crossfade effects (optional).


Step 4: Click the Merge button. After that, preview the merged audio. And then download it or save it to Dropbox and Google Drive.


Comparison between the two audio joiners:


If you plan to use online merging tools, a table can help a lot to see the difference between them.


 Online Audio Merger Audio Joiner Clideo
 Merge audios on Mac  
 The source to select audios The PC The PC, Dropbox, Google Drive or URL
 Supported input formats 300+ N/A
 Add a crossfade effect Y Y
 The kinds of output formats 4 15+
 Cut audio files Y N
 Rearrange the order of audios Y Y
 Totally free Y Partial
 The speed to upload Fast Slow


How to Merge Video Clips on VLC without Hassle


How do I combine two videos side-by-side as a single video in VLC? ”
Is it possible to merge larger video files using VLC media player?”
 
- From Quora

Many people are confused that how to merge clips. This kind of problem is a common one. There might have some solutions on the Internet. But the operations might not be described as simple as this article. Let’s continue, you will know how to join different videos step by step via VLC.


Part 1. How to combine several videos via VLC Media Player?


VLC Media Player is a powerful multimedia player. Except for most of the multimedia files, it still supports to play various videos, like DVDs, Webcams, Devices, and multiple streaming protocols. VLC can launch on all platforms, including Windows, Linux, Mac OS X, Unix, iOS, Android, etc. Most important of all, it is totally free without ads and limitations. 

Steps to combine clips via VLC:

Step 1: Download and install VLC Media Player on the official website. After that, run VLC. Import the videos you want to merge. (Click the “Media” button and then select the “Open Multiple Files”.


Step 2: And then click the “Add” button. You can add one file or several videos at the same time.


Step 3: Click the “Play” button and then select the last option “Convert”.


Part 2. More recommendation: Joyoshare Video Joiner


Joyoshare Video Joiner is another professional merging tool. Like VLC, Joyoshare can join multiple videos together. There are two modes provided to you: High-Speed Mode and Encoding Mode. The former can merge videos losslessly and fast. The latter offers various output formats, including Devices, HD Video, Web Video, General Video, and General Audio. If you choose audio formats, it means that you extract audios from videos.

The reason why I recommend Joyoshare Video Joiner to you:
  • Merge videos at 60X faster speed
  • Has built-in cutter, editor and converter
  • Combine videos in a lossless way

Steps to merge videos via Joyoshare Video Joiner:

Step 1: Import several videos to Joyoshare Video Joiner.

After downloading and installing Joyoshare Video Joiner, run it. Joyoshare allows you to add videos by opening video files from a local folder and dragging and dropping them to the screen. Then you can rename and rearrange the order of your videos.


Step 2: Pick one merging mode and choose the output format.

Joyoshare Video Joiner provides you two modes. If you want to join videos without quality loss and at a high speed, choose the High-Speed Mode. Of course, if you want to cut, edit or convert your files, Encoding Mode is your best choice. There are a great variety of formats on Encoding mode. You can choose a format different from the input mode. 


Step 3: Remove the unnecessary parts of your video and edit the videos. (Optional)

Joyoshare Video Joiner has an inbuilt cutter and editor. Some people’s videos may have commercials. So, in this step, you can cut the ads.


Step 4: Edit the videos before merging.

Joyoshare Video joiner is also an outstanding editor. You can adjust rotation, use different video effects, like editing saturation, brightness, and contrast, add a frame to videos, insert watermark in image or text, embed subtitle, insert background audios, etc.


Step 5: Merge videos by one click only

On the right bottom location, the “Convert” button lies. Click the button and then your videos merge at 60X faster speed. No matter how large your videos are, merging can be finished instantly. Then a window will pop up, that is the location of the merged file.


Conclusion:


After reading this passage, you have known the VLC Media Player can meet the basic need to merge videos. But its merging speed is not as fast as Joyoshare Video Joiner. Besides, Joyoshare has more functions. Except for joining videos or audios, you can use it to convert videos or audios. Joyoshare allows someone without registering to merge videos for free with 5 times. Have a try! You can exactly know its functions before buying. What’s more, Joyoshare Video Joiner only supports Windows and Mac. If you want to use fine software running on Mac OS X, Unix, iOS or Android, VLC is highly recommended.

Top 5 Online Video Mergers to Combine Video Files

Have you ever wanted to merge videos? In that case, online video joiners will be better due to its convenience. If you search on Google, you will find a great variety of tools. Then what should you do when facing all strange apps to combine videos? To save your energy, you should read some evaluative articles about different tools. Go ahead! This passage will tell you the difference between 5 best online video mergers.

1. Merger Video Online


Merger Video Online is a totally simple-to-use online video joiner. It is especially suitable for new starters. When using it, you can feel free to add files from the computer, Dropbox, Google Drive, or online source by submitting a detailed URL. At your own will, you can add several videos in various formats. It's also workable for you to re-arrange the order flexibly.

Alternatively, this lightweight tool can support diverse output formats, like 3G2, 3GP, AVI, ASF, F4V, FLV, M2V, M4V, MKV, MOV, MP4, MPG, MPEG, MTS, OGV, RM, TS, VOB, WMV, etc. Once the processing is completed, you can directly download it to your local folder. Or simply add to your Dropbox and Google Drive.


Pros:

  • Upload video files from the computer, Dropbox, Google Drive or online URL
  • Add video files at the same time or one by one
  • Adjust the merging order based on actual need
  • Can choose the output format and set destination file's name

Cons:

  • No auto-play function
  • Have no option to cut needless parts

2. WeVideo


WeVideo is not just a web-based video merger. To a large extent, it also acts as an online video editor. Hence, it is effortless to mix and match over 600 formats of videos, images, audios, and graphics. Under the help of WeVideo, you are allowed to create horizontal and square videos at up to 4K resolution. You can as well add transitions, text, motion effects, green screen, and more to make your videos cool.


Pros:

  • Merge videos online with ease
  • Show users editing tools
  • Make content secure as it is hosted on the cloud

Cons:

  • The price is unfriendly and unreasonable


3. Video Toolbox


Here is another video merger online, Video Toolbox. Frankly speaking, it is a relatively advanced tool that offers the ability to process video files up to 1500MB. More brilliantly, this smart tool is capable of analyzing your uploaded video files in a fast way so that you can familiarize yourself with all the information, such as bit rate, frame rate, codec, resolution, etc.

Essentially, Video Toolbox is able to join multiple video files with easy one-click. It can convert any files to the one you like, including 3GP, AMV, ASF, AVI, FLV, MKV, MPEG, MPG, RM, VOB, WMV, MOV, M4V, and MP4. Taking the aid of it, you will benefit yourself a lot. You can get access to extract audio from video, add text watermark to video, insert embedded subtitles and take snapshots, and so forth.


Pros:

  • Support tons of video formats
  • Cut unnecessary fragments off
  • Permit you to create thumbnails for your video clip

Cons:

  • No available video effects


4. Cellsea


Cellsea is a free online video merger that has the option of merging video files into a single one. Meanwhile, it enables you to export your video file to 3GP, AVI, MOV, MP4, and FLV. By means of Cellsea Free Online Editor, you can manipulate a number of editing tasks as well. In detail, it empowers you to trim, crop, resize, and join all types of videos. You can even add an audio track to the required video.


Pros:

  • Support inputting lots of video formats
  • Allow you to add an audio track to the video if need

Cons:

  • With some basic features only

5. Movie Maker Online


Movie Maker Online can be regarded as a versatile online video combiner. To satisfy more users, it comes with full-featured designs. Comprehensively, you can drag and drop files to set an order or set customized duration for text and images. It's also practical to change timeline zoom to get a better visual representation.

Sometimes, the duration of your audio track may exceed the duration of your imported video. Happily, Movie Maker Online will automatically trim and make both of the same. Certainly, it is vital for you to add effects, like crossfade, fade-in and fade-out, to produce a smooth video file.


Pros:

  • Support 150+ video formats
  • Have editing diversity characteristic
  • Entitle you to use royalty-free music, photos, and images

Cons:

  • During the using process, any ad-blocking plugins are disabled


More Recommendation - Joyoshare Video Joiner


In case you are not fond of these aforementioned online video merger tools and yearn for more qualified ones, you can look further on Joyoshare Video Joiner. What distinguishes it from other online video joining programs is its unique merging mode. It can quickly and easily combine unlimited videos without loss of quality.

Pleasingly, it allows you to trim certain parts, rotate video anticlockwise and clockwise, crop undesired area, flip video vertically or horizontally, add subtitles, customize watermark, apply marvelous effects, adjust aspect ratio, hue, brightness, saturation and contrast and so on. Almost all kinds of video formats can be supported and reset, including M4V, MOV, MP4, AVI, MPEG, H.264, FLV, MKV, 3GP, 3G2, WMV, DivX, WebM, VRO, WTV, OGV, etc.


Why Choose Joyoshare Video Joiner?


  • Combine multiple videos with no quantity and size limit
  • With professional inbuilt video editor to enrich the video
  • Specify configuration info like codec, resolution, bit rate, etc.
  • With the ability to take snapshots and re-arrange order for videos
  • Work at 60X faster speed without compromising quality

Top 8 Video Merger Software to Combine Videos Without Data Loss

Are you keen to shoot videos? Are you mad at some video segments you want to cut? In that case, if there is software that can cut the unwanted sanctions and then join the rest together, that will be better. The answer you look for is in this article.

To produce a wonderful movie, what you really need is a professional video merger. There are so many kinds of video joiners on the Internet. Therefore, you may feel hesitant about which one to pick. Keep reading! We have selected 8 best video merger software, which all can join video clips with high quality on the PC or Mac computer.


1. Joyoshare Video Joiner (Windows & Mac)


Joyoshare Video Joiner is one of the best video joiner and cutter tools in the current market. It allows you to cut and remove the unwanted parts, edit the video in the way you like, and then merge the video clips to form a new one. The cutting and merging process takes only a few seconds, without causing any quality loss.

Besides, you're also free to edit the videos such as trim the video clips, adjust the aspect ratio, rotate and crop a video, add watermarks and subtitles, or apply special video effects, etc. As the best video merger for PC and Mac, it supports lots of input and output video formats including MP4, MOV, MKV, M4V, AVI, MPG, MPEG, 3GP, H.264, etc. You can also export the merged video onto various portable devices such as iPhone, iPad, Galaxy, PS4, Samsung TV, etc. or directly share it with media platforms like YouTube, Facebook, and Vimeo, etc.


Pros:

  • Merge and cut videos losslessly without size limit at 60X speed
  • Re-arrange order for all imported video files
  • Change codec, bitrate, channel, resolution, etc. easily
  • Support tons of video formats and devices
  • With built-in video editor, snapshots capture and preview window
Cons:

  • Cannot support crossfade


2. Joyoshare Video Converter (Windows & Mac)


If you want to join multiple video files in the same or different formats, you can try Joyoshare Video Converter. You can also get the video merger software download free of charge from the official website. It is a smart and wonderful video converter, video editor, and video merger tool. With the software, you can easily merge different video files to a single one at 30X faster speed with original video quality intact.

Joyoshare Video Merger empowers you to join any video files to almost all common video formats including MP4, WMV, MOV, AVI, FLV, AAC, etc, and then save the joined video file on multiple mobile gadgets like Apple iDevices, Samsung smartphones, LG, HTC, etc. You can also rename for the file, specify the bit rate, frame rate, codec, and quality according to your needs.


Pros:

  • Combine multiple video files with different formats into one
  • Rip DVD to video and extract audio from DVD
  • Merge videos at 30X faster speed in high quality
  • You can also edit the video files before conversion

Cons:

  • Cannot select files from URL


3. Movavi Video Editor (Windows & Mac)


Another best video merger software for PC or Mac is Movavi Video Editor. The program provides an easy way to merge MP4 and other videos into one and also gives you a chance to edit films in different ways. Creating full-length movies using Movavi Video Editor can be very easy. You just install the video merger on the computer first, upload the video files to the software, edit the videos if you want such as add transitions, filter, and titles, etc and then save the edited video in the format like AVI, MP4, WMV, FLV, MPEG, MOV, etc.


Pros:

  • Merge video files in an easy way
  • Edit video clips on a timeline
  • Add titles, filters, and transitions to the video

Cons:

  • Export videos in limited video formats

4. Free Video Cutter Joiner (Windows & Mac)


Available for both Windows and Mac, it is the easiest video merger software freeware that is able to cut large videos into smaller ones and slice off the unnecessary parts of the video such as commercial ads, trailers, and outtakes. Additionally, it enables users to combine several video files into one file in MP4 format at a very fast speed. And merging video files with the program only needs a few clicks. Free Video Cutter Joiner also supports multiple video file formats including MP4, MPEG, WMV, AVI, 3GP, FLV, etc.


Pros:

  • Free video merger software
  • Cut and merge video fast and easily
  • Work well with many video formats

Cons:

  • Lack of powerful video editing tools

5. Winx Free Video Converter (Windows)


Winx Free Video Converter is one of the best free video merger software for Windows 10/8/8.1/7/XP/Vista. You can use it to combine videos in different formats into a single and continuous one file at a fast speed without altering the original quality. It supports numerous video formats for merging and saving including H.264, MPEG, WMV, Blu-ray video, AVI, MP4, AVC, MOV, FLV, etc. Moreover, you're also given the option to edit your movie like adjusting volume, adding subtitles, cropping video files, trimming the video, etc.


Pros:

  • Video joiner freeware for Windows 10
  • Merge videos with different formats in high quality
  • Video editing features supported

Cons:

  • Not available for Mac


6. Weeny Free Video Joiner (Windows)


This is another merge video software freeware for PC, designed for people who are seeking for a free solution to combine multiple video files into a large one. The simple interface makes it very easy for anyone to join video clips, even if you've never used it before. Weeny Free Video Joiner is competent for merging different video formats like MP4, MPG, 3GP, AVI, FLV, RMVB, VOB, WMV, MKV, and then converting it to other videos in the format such as MP4, MPG, AVI, FLV, WMV or WMV. What's more, it also allows you to customize the output settings including codec, size, bit rate, frame rate, audio volume, and quality.


Pros:
  • Intuitive interface and simple to use
  • Merge videos for free and easily
  • Support vast input and output formats
  • Adjust the output video settings

Cons:

  • No Mac version offered
  • Don't have other video editing tools


7. Ultra Video Joiner (Windows)


Ultra Video Joiner is a professional video merging tool that enables users to combine or join many video files into one large file. As a useful AVI joiner, MPEG joiner, MP4 joiner, etc, this program supports various different video formats including AVI, MOV, MP4, FLV, MKV, etc. You're also free to add the number of video files and rearrange the order for merging, and then save the combined video in the formats of AVI, WMV, MP4, Divx, XviD, MPEG, FLV, VCD, SVCD, DVD.


Pros:

  • Merge video files without re-encoding
  • Join videos with just a few mouse clicks only
  • Multiple video formats supported


Cons:

  • Only work well on Windows
  • No other powerful editing features provided


8. iMovie (Mac)


If you're a Mac user and you're looking for good-to-use video merger software for Mac, you can consider iMovie. This is a simple yet useful video editing program pre-installed in the Mac computer by Apple. You can use it to cut, edit, and create best movies as you like, of course, you can also use it to merge video clips together with high original quality preserved. The app is available for macOS and iOS, so you can start to merge and edit the video on your iPhone, continue to iPad and then finish it on the Mac, as you like.


Pros:

  • Free video joiner and editor
  • Contain powerful video editing functions
  • Support 4K resolution

Cons:

  • Can only perform on macOS


The Bottom Line:


The video merger software recommended above all has its own advantages and disadvantages. You can select one of them to join videos. Of course, you can also search for other tools, but this is an energy-consuming job. If you want to join multiple video files for free, you can consider Free Video Cutter Joiner, Weeny Free Video Joiner or Winx Free Video Converter; if you want to merge videos on Mac, you can select iMovie to edit and join videos; if you want to combine unlimited video clips losslessly, Joyoshare Video Joiner is highly recommended. And Joyoshare offers 5 free opportunities to merge videos/audios. As for me, I just cut and merge videos several times, so it is totally free. Anyway, you should figure out what you actually need. And then pick one which is the most suitable for you.


[2020] Top 6 Ways to Fix iTunes Error 0xE80000A [100% Working]


Q: "I’m trying to restore the back up to my new phone but am error pop up box keeps coming up saying “iTunes could not connect to this iPhone. An unknown error has occurred (0xE800000A)." – KBeee from Apple Discussion

It is one of the reports about error 0xE800000A from Apple users. This kind of error is common. If so, that means your iPhone cannot connect to your PC successfully. Don't worry about that. In the following content, you will know how to fix error 0xE80000A with some easy ways.


Part 1. Error 0xE80000A occured? Why?


In this part, I will list some common causes of iTunes error 0xE800000A.

#1 hardware problems

  • Damaged Apple USB cable/port

#2 iTunes

  • Your iTunes is not the latest version
  • The iTunes software is installed incompletely

#3 iDevices

  • Your iOS or iPadOS device is locked
  • Your device is turned off
  • Influenced by your other devices plugging on PC 
  • Some processes in your system background disturb 

#4 computer

  • You refuse to Trust the Computer 
  • Your computer has something wrong

#5 others

  • Poor network

Part 2. How do I fix error 0xE80000A?


If the error exits all the time, your iOS device is equal to a useless one. Here will recommend you some ways targeted to different situations.

#1 Check for some external factors

  • Inspect the connection between your iDevice and computer. Is the cable loose? Then reconnect it. The cable cannot work? Try another cable.


  • Check for the network on your iOS device.
  • Try another computer.

#2 Inspect some internal conditions of the device and the computer.

  • Upgrading your Windows operating system.
  • Restart both your device and computer.
  • Select Trust the computer when your iDevice plugging in.

#3 Upgrade the iTunes to the latest version

If the cable works well, then there may be something wrong in iTunes, such as its outdated version. You can try the second solution as the following step:

Run iTunes > Click the Help button > Select Check for Updates


#4 Reset Lockdown folder

If the iTunes version is latest, the error still displays. Then you can try to reset Lockdown folder.

Step 1: Press Windows + R to the Run box. Input %ProgramData% into the Open field, and then click OK.


Step 2: Select the Apple file and double click it.

Step 3: Choose the Lockdown folder with right-click. Rename the folder to Lockdown.old.


#5 Uninstall and reinstall iTunes

Here’s how to delete iTunes and reinstall it:

Step 1: In the search bar, type iTunes.


Step 2: Right-click the iTunes application on the search results and select the last option Uninstall.

Step 3: Wait for the process to complete.

Step 4: Restart your PC and open the Control Panel.

Step 5: Select Apps & Features.

Step 6: Remove the following programs in chronological order:

  • iTunes
  • Apple Software Update
  • Bonjour
  • Apple Application Support (32-bit)
  • Apple Application Support (64-bit)

After uninstalling iTunes successfully from your Windows 10 computer, reinstall iTunes. Get the latest version of iTunes from the Microsoft Store. Follow its guide to install it. Restart your computer again.


Note: If something wrong in iTunes, these methods above can help you to fix it. But they are kind of complicated. If you have taken all the measures and the error still occurs, then you can try a system repair tool as follows. You don’t need complex operations to use it. With Joyoshare, you can repair error 0xE80000A with only some clicks.

Part 3. Is there an easier way to repair the unknown error?


Joyoshare UltFix iOS System Recovery is an extraordinary iOS repair tool. It can fix 30+ system issues, including most of iTunes errors (0xE80000A, 9006, 14, 54), black screen, stuck in DFU mode, etc. Joyoshare is compatible with the latest iOS 13. Most important of all, this kind of iOS system recovery can ensure no data loss. In addition, it offers free Enter/Exit Recovery Mode, which can solve some basic system problems.

Why Joyoshare is your best choice:
  • Easy to use
  • Not lose your data
  • Fix more than 30 system issues
  • Joyoshare UltFix ios system recovery

How to fix iTunes error 0xE800000A with 4 simple steps:

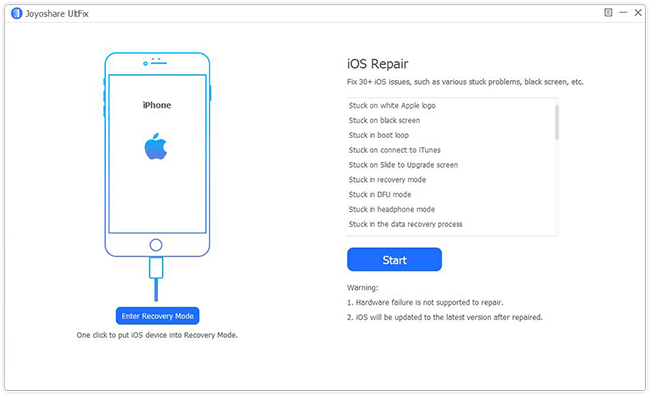
Step 1: Download and install Joyoshare UltFix. Launch it. When the main screen display, you can click the Enter Recovery Mode first, and then click the start button.


Step 2: Select one of the two repair modes. Standard mode can effectively fix the error 0xE80000A. Advanced Mode has more powerful functions. If you want to remove your screen passcode or get your device into Factory Reset, the latter will be better.


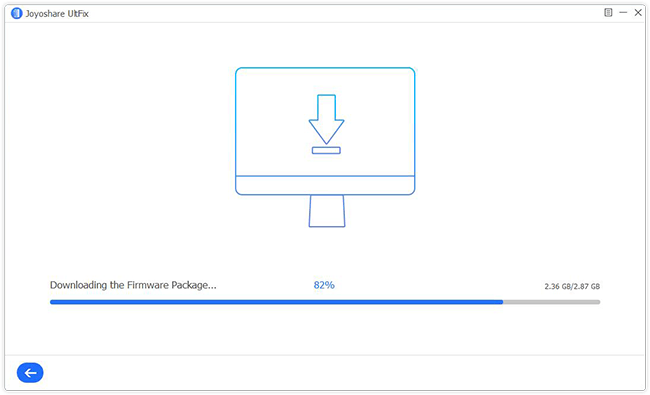
Step 3: Download the firmware package. It can automatically recognize your device’s version and download a suitable one. In this process, you can downgrade your iOS version. And then verify the package.


Step 4: Begin to get rid of the error 0xE80000A. Press the Repair button and wait it finished. You have to make sure the cable connects the device and the computer in the whole repairing process.


Suggestion:


When you come across this issue, check for the external conditions first. Maybe sometimes problems occur on your useless cable. Then inspect the conditions of the device and the computer. Some iOS system issues can be fixed by restarting. The most complex is to solve the issues the iTunes itself has. Try the above solutions one by one, and I believe that there is always a way can help you to fix iTunes error 0xE80000A. If you wonder to take an easier way, Joyoshare Ultfix, the third-party tool, is the best. It has outstanding functions to fix many other different kinds of issues without data loss, except error 0xE80000A. With this tool, you don’t need to worry about what error will occur in your lifetime at all.


Hot Article